Archive for the ‘Design’ Category
Finishing My Portfolio
Posted on: August 28, 2009
***As I write this, I’m slightly mortified that my writing skills seem to have deteriorated into nothing over the summer. My greatest apologies! o.O’***
So, I decided that I was going to go with my original idea. Finish off my portfolio with a yellow and red pop to show off my vibrant personality!
For the first half of how to make the portfolio itself, please click here.
To finish it off? Once again, my inspiration came from K and Company’s beautiful scrapbook bounding technique.

Once again, I did funky math:

Measured and sliced my paper according to Professor Matias Ocana’s wise words… “Measure three times, cut once.”


After Elmer gluing the paper down to my binding strips, I busted out some sealant!

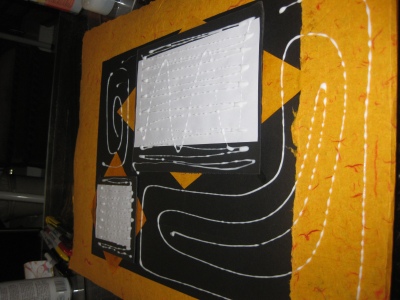
Let it dry, popped open some holes, and then… excitement! It was time to slice, dice, and reuse my leftover quarter inch foam board from the 27 square project! Measured everything out, and glued one side (the side furthest from the binding side) down to look like this…


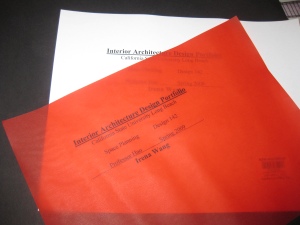
Then, printed out a little title block for the front of my portfolio:

Dropped a corrugated black border all around…

Split an opening in the yellow paper…


And then a smaller one for my logo, and glue the excess back…

Glue my text into place, than the paper to the foamboard…


I was too lazy to cut a boarder, plus, I plan to add something on top to cover the messiness. However, I did fold the edges down into 45 degree angles to get sharp, crisp lines that will peek out later…

After tucking everything back, ta da! Starting to look exciting to me! =] I slice two red sheets and mod podge it to seal it in…


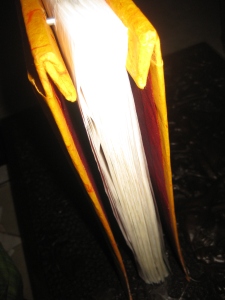
And while I wait for the thick layer of mod podge to dry, I cut out an excess sheet of yellow paper to mod podge, glue together, and then cover the binding…

Slipped the extra paper in…

Then after the red sheets have dried, glued it in the center so there is a pretty yellow boarder all around!

Note how I folded the edges at a 45 degree angle earlier so the overall effect looks more crisp and put together here.

Protected ALL my trace papers (went through approximately 600 of those darn hole reinforcement lables… Wal mart, pack of 900! =]) Pop everything in, screw everything shut…


And I’m done! =] I plan to make a logo and print it on clear sticker paper which I’ll cut and tape into the little red square on the lower right corner of my portfolio. Yay!
Making a Portfolio
Posted on: February 4, 2009
Oh-kay! So its week two at school and I’m getting back into the groove! I’m impressed with myself that I haven’t fallen hopelessly behind already, and I hope to continue to do my best to keep up with the semester as it gets harder and harder.
So, whats the best thing to first get out of the way the first week of the semester? Making your DESN 142 Space Planning folder, duh! So, here is a comprehensive (or, not-so-comprehensive-as-I-don’t-make-any-sense) photo blog of how I made mine, and why it is supremely more annoying to work with, but more aesthetically pleasing to the eye than the regular hut hut one two cut! =] I hope it helps you guys make yours, and if I’m not clear on anything, just yell at me when you see me in class, and I’ll come back on here and edit the post to clarify, kay? =]
So here we go!
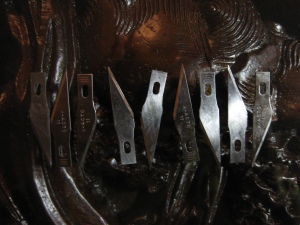
 These are the materials I used to make my folder. Two illustration boards (or you can buy one big one and cut it down to two pieces), T-square, ruler, screw-posts, pencil, exacto knife, tons and tons (well, not really, more like the 100 spare pack) of new blades, and duct tape. I wanted my board to look neat, so I used thin electrical tape so it would blend in nicely black on black. If you want, feel free to buy book binding tape (it seems to work great on other people’s portfolios, I’ve been too cheap to buy it for myself still, perhaps later on…), or, if you wish, just use the duct tape in whatever color that suits your tastes.
 Now, I’m horrible when it comes to math, but the main thought process goes like this… my projects are going to be 14″x20″ respectively, so I need a boarder around my pages, and then extra space to screw all my works together. If I’m looking for a 1/2″ boarder all around (in retrospect, I should have done a 1″ border all around, I think it looks better, so you should do it for your book! =]) I tack that number upon what my project size is going to be. This makes my 14″ side of my project a 15″ wide border, while it makes my 20″ side of my project a 21″ border. I cut these two sizes out of my illustration boards. With the leftover scrap pieces, I slice out four more 1″ strips that run alongside the 15″ boarder, leaving me a total of two 15″x21″, and four 1″x15″ strips of illustration board.
 I take two of the 15″x1″ strips and measure off three even spaces to hold all my artworks together. The math comes out to 2 1/2″, 7 1/2″, 7 1/2″, and 2 1/2″ between each hole I have to punch out on the two strips of illustration board.
 I then take this really awesome hole punching tool my dad has, and slowly saw out 6 holes into the illustration board with newspaper padding underneath so I don’t create a disaster:

 Pretty cool, huh? Yeah, I think so too. =] Anyways, you take one punched strip, and one unpunched strip, lay them down flush with each other on half of a long strip of electrical tape (or whatever kind of tape you have) and smooth the tape so it adheres firmly to both sides of the different strips. Thus, it creates something that looks a little like this:

 flip the excess tape over to the inner side, and fill the rest of the empty space with a long strip of tape like this:
 After this, you take your big piece of board and tape it alongside the punched holes strip and tape that all together, making sure to keep the holes free of tape.
 Reinforce both sides so they are both covered in tape, with enough empty room in between both pieces of board to flex pretty much 360 degrees any way you decide to fold your board pieces.
 Notice the grooves in the tape between the two pieces of illustration board. This allows for the flexibility that will play a key role later on in folding everything into perfect shape. After doing the same treatment above to both boards and strips of punched and unpunched tape, you should be able to fold in your three pieces of board to look something like this:

 Note how the punched strip of illustration board is currently sitting on top, don’t make the same mistake as me by accidentally taping the wrong side down and folding the punched strip inward. Your board will not work if you do not have the punched holes on top when folded like this. Now, you are ready to unfold the two strips on both pieces of illustration board, and attach them together via screws. Drop the screws in, so when you fold your flaps back up, they look like this:
 Do the same with the opposite sides of the screw on the other board:
 Carefully align both sides up with each other, and screw them in together, one by one.
 Now, you should have a tightly secured huge illustration board folder that is bound together with a middle that looks something like this:


 I ran an extra layer of electrical tape along the top and bottom edge of my side, both for securing reasons and aesthetics as well.
 And as of now, that is it! For part one on portfolio building, I am done!
I plan to elaborate a little bit on my portfolio, currently debating whether or not I should add a pop of color to show my vibrant personality, or if that will repel future employers due to it being “unprofessional”. For part two on portfolio building, I plan to cover the spine of the portfolio, protecting the spine edges of the pages from possible wear and tear. When I finish that part (probably near the end of the semester, or during summer), I will link it with this post. Or, if your lazy, just find your own creative way to cover the spine, anything from book binding tape to your own creative huzzah. Remember, be flexible. You don’t have to do everything exactly the way I do it… think of this as more of a “guidelines” to help your creative juices start flowing as you create your own unique portfolio that is durable and yet says something about you. And remember…
 keep changing your blade! Again, and again, and again… to achieve that flawless sharp edge! =]
Let me know if this has helped you out or not, see you all in class! =]
***Finished giving my portfolio a pop! Follow the link here.***